Getting Setup for WordPress Gutenberg Accessibility Testing

The WordPress Accessibility Team recently sent out a call for help with the development of the Gutenberg editor, specifically when it comes to its usability and accessibility for people with disabilities.
Are you interested in helping out? Here's how to get your local testing and development environment setup and ready to go! 🚀
Note: If you're only interested in testing and not development, you can install the Gutenberg plugin from your WP Admin panel or from the Gutenberg plugin page and skip steps 2–4. (Thanks @mor10 for the tip!)
1. Install WordPress
If you don't have a local WordPress instance available to work with, checkout the Setting up a Development Environment guide.
Tl;dr:
1.1 — Install MAMP or WAMP (if working on macOS or Windows, respectively.)
1.2 — Download a copy of WordPress .
1.3 — Follow along with the Famous 5-Minute Install guide.
2. Install Node.js
The Gutenberg plugin requires node version 6.10.3 or higher to work. Check your version by opening your Terminal app and running the node -v command.

If you don't have node available, probably the easiest way to get Node.js and NPM together is by downloading and running the official installer from nodejs.org .
After that's installed, run node -v again to make sure you're all set.
3. Get the plugin source code
Grabbing a copy of the Gutenberg source code is a few steps but it's quite easy.
3.1 — First, we'll fork the Gutenberg project in order to have a copy to work with directly. On the Gutenberg GitHub page , click the "Fork" link near the top-right of the screen.

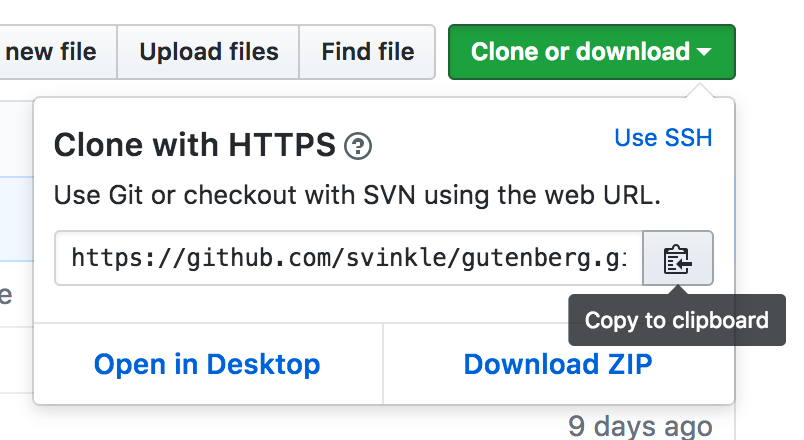
3.2 — Next, we'll need to clone your copy of the project. On your fork page , find and click the "Clone or download" button . Within the revealed drop-down menu, copy the contents from the input control to your clipboard.

3.3 — Lastly, in your Terminal app, change directories to your local WordPress plugins directory.
cd wordpress/wp-content/plugins
Then run the git clone command to bring the source code from your fork down for local editing.
git clone https://github.com/[github-username]/gutenberg.git
We now have the code and are ready to build the plugin for testing!
4. Build the plugin
Before we can start using and testing the plugin in WordPress we need to build the plugin from source. It's not as scary as it sounds and is only a few steps!
4.1 — First, in the Terminal app, let's change directories to the new Gutenberg folder which was created when we previously ran git clone :
cd gutenberg/
4.2 — Next we need to download all the dependancy files that the Gutenberg plugin requires to build. Running this one npm command will do all the hard work for us:
npm install
You might want to grab a ☕️ as this can take a minute or so.
When npm completes its task, you should have a new node_modules folder with a whole bunch of stuff inside. This is everything that Gutenberg needs to build and run!
4.3 — Lastly, let's build the plugin in order for WordPress to see it and for us to start testing. Run the command:
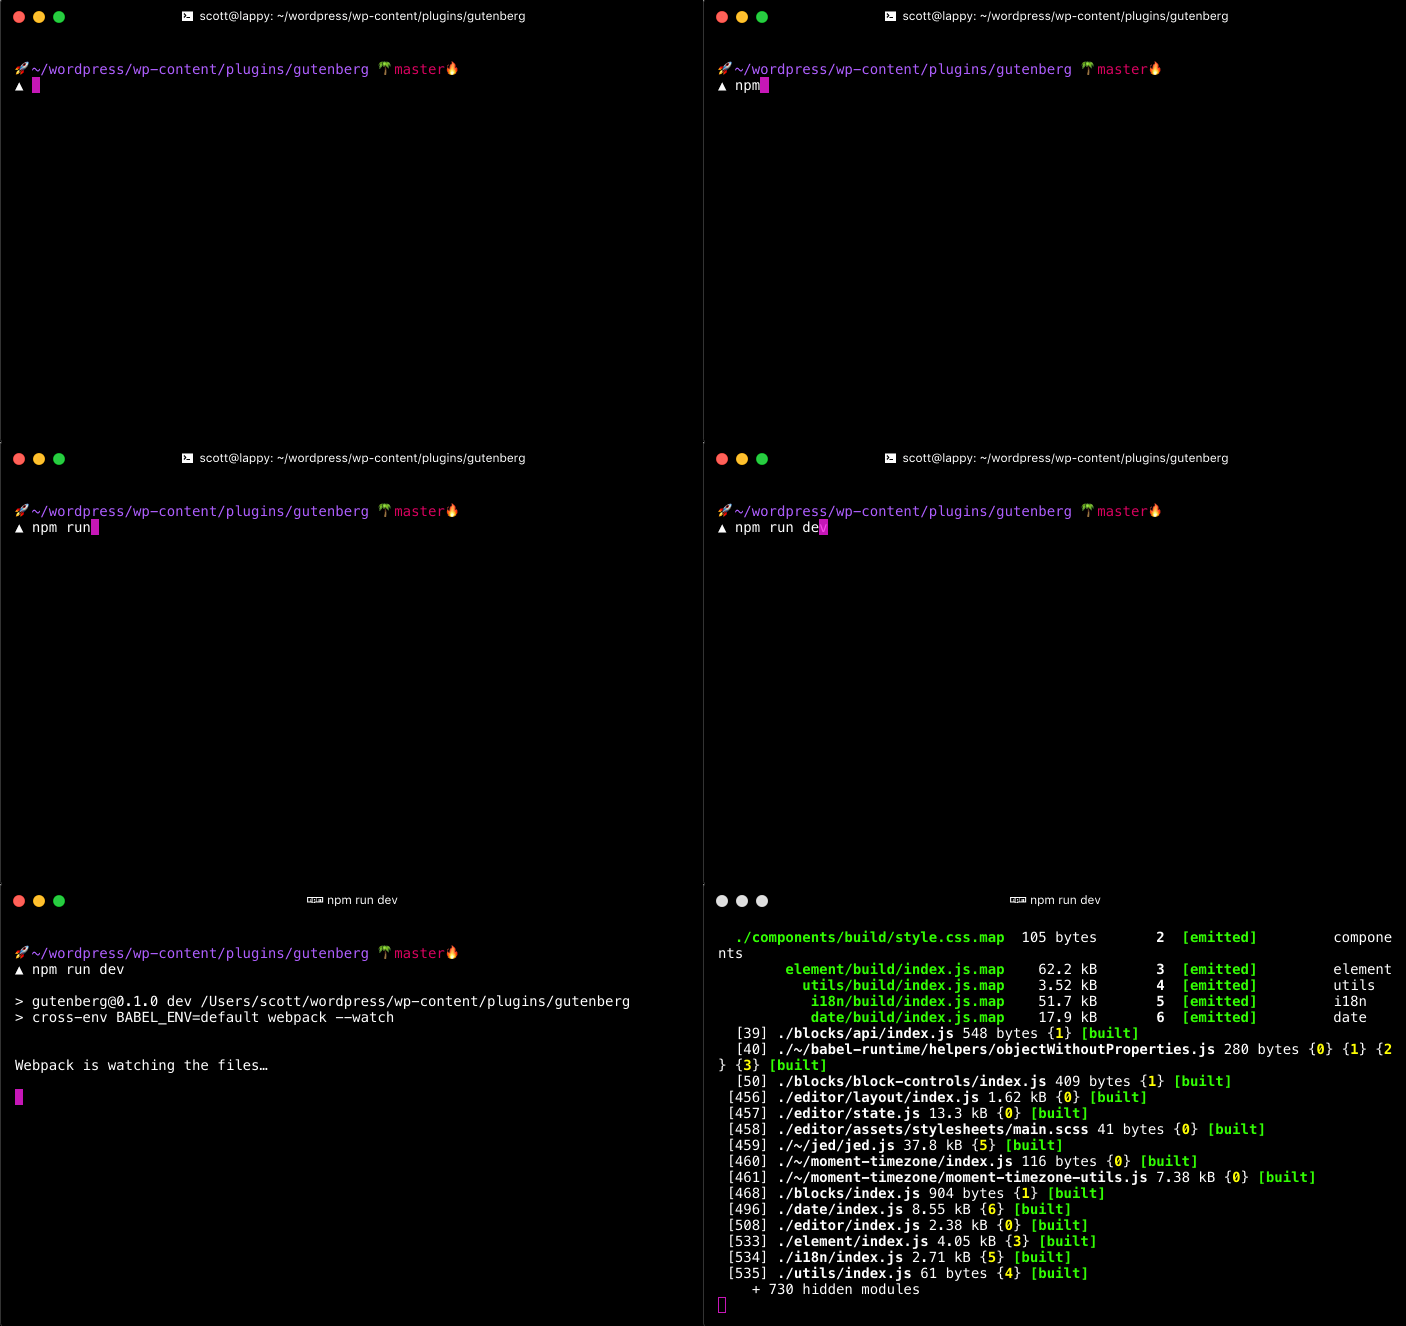
npm run dev
This command not only builds the plugin, but it also watches for changes to any of the files or directory structure. If a change is detected, the build runs automatically! This is great in order to quickly see our code changes right away in the browser.

5. Enable the plugin
From this point we can enable the Gutenberg plugin in our WordPress instance and start checking things out!
5.1 — To enable the plugin, login to your WordPress admin panel and go to the Plugins page.
5.2 — Find the Gutenberg plugin in the list and click the "Activate" link !

6. Start testing
On the WordPress sidebar, click the "Gutenberg" link and try it out!

From here, start testing with just your keyboard and see how easy/difficult/intuitive the interface is!
- Are you able to reach the controls?
- How difficult is it to make edits or add photos?
- What about actually publishing the post? Is it easy to find and use the submit control?

If you're also inclined, try enabling and working with a screen reader !
- Does the interface announcements make sense?
- Are the controls labelled properly?
- Does clicking and activating a control have an expected result?
7. Creating an issue ticket
If you've found something that you'd like to report to the WordPress Gutenberg team, there's a few steps to take.
7.1 — Go to the Gutenberg Issues on GitHub and click the "New issue" link , which appears near the top-right of the screen.

7.2 — From here, a form will appear with a single text area for filling in the issue details you'd like to report for the project maintainers to read.
There are a lot of pointers on what to add to the ticket that is pre-filled within the text area. Details such as steps to reproduce, current and expected behaviour, and a recommended solution to the issue. Along with these, I'd also suggest adding:
- Any related source code, the file name and line number
- A screen capture of the area in question
- The WCAG Success Criteria number for greater context
- Any OS/browser/assistive technology information
These extra details will go a long way with helping the maintainers figure out the issue and will lead to a much more through and interesting discussion.
7.3 — When you're satisfied with the info you've provided for the ticket, click the "Submit new issue" button and wait for a response!

Remember to be kind and respectful when discussing issues with other folks out there. The project maintainers will respond when available and hopefully your ticket will lead to a solution and fix the issue in the project!
We're all in this together. Let's help Gutenberg be a great success by making it usable for all ! 🙂
I think this should be sufficient to get anyone who wants to help out up and running. 🤔 Let me know how this initial setup goes for you and if I missed anything in these steps!
Soon I hope to have another post on developing for Gutenberg, including where to make code changes and how to create Pull Requests to get your solutions merged! 💪
Resources and Links:
- Gutenberg — Development hub for the editor focus in core
- Gutenberg plugin source on GitHub
- How to Contribute to the Gutenberg project
- Current accessibility issues list
- WPAccessibility Team on Twitter


